Wednesday, May 30, 2012

Sweet - The Cutting Cafe

Happy Wednesday everyone! I am so excited to share my latest creation using the Strawberry Treat Box file from The Cutting Cafe!

IMG_6598

I love strawberries....to eat and to create with. There is something about the red, white and green combination that really inspires me. I used the strawberries that came with this set and made a matching basket and card.

IMG_6599

I embossed the background of my card with a new folder I recently added to my collection. I used Bo Bunny dot paper for the strawberry and added some white pen for detail. I really like the look of kraft cardstock so I added a strip of that and embellished it with twine and some red Dew Drops.

IMG_6600

I found a tutorial to make this sweet little basket and embellished it with another berry.

I hope you will visit The Cutting Cafe blog and see what the other members of the team have created using this weeks yummy files. The post will be up sometime today.


Photobucket

Monday, May 28, 2012

Canadian Scrapbooker Publication :)

I am so excited to share that I have been published again.

canadian-scrapbooker-summer-2012

We just received our copies of the Summer 2012 Canadian Scrapbooker magazine at the store and I am happy to say that my layout is being featured on page 124.

IMG_6601

This publication is extra special to me because my BFF (Joanne) is also published in this issue too. You can find her awesome layout on page 44! Way to go girl :)

I also wanted to give a shout out to Christa who is featured on page 45, Sharlene who is featured on page 123 and Laura who is featured on page 63!


Photobucket

Wednesday, May 23, 2012

Buzzing By Card - The Cutting Cafe

Happy Wednesday everyone. I love Wednesdays because it is reveal day at The Cutting Cafe. This week we worked with a really fun set - Beehive Shaped Card Set! There are all sorts of great goodies included in this set. I chose to use the following:

*Small background (I made my own background paper)
*SVG cutting file for my bee (love this bee)
*Sentiment

Here is my card:

IMG_6440

Once I cut out all the pieces for my bee (using my Silhouette), I layered it together (inking the edges with brown and white) and adhered it to my card using an Action Wobble. By using the Action Wobble, it actually moves back and forth. I just love this little tool :)

IMG_6441

One of my favourite things about The Cutting Cafe files is the fact that they almost always come with printable phrases or sentiments. They always coordinate perfectly.

IMG_6442

Be sure to visit The Cutting Cafe blog and see what the other ladies have done with this amazing set. The blog post will go us sometime today.


Photobucket

Monday, May 21, 2012

Watering Can Gift Bag

I know I have mentioned this before, but I just LOVE my Silhouette. I don't think I have ever owned a tool that I use more and that give me so much versatility when I scrapbook.

Today I want to share with you a 3D project I did for Mother's Day. I used the Mother's Garden SVG kit from SVG Cuts to make this watering can gift bag. Of all the places I visit for svg's, this is my favourite one.

IMG_6249

I cut the main part of my watering can out of this beautiful dot paper from LilyBee Designs. I added the border from one the the coordinating papers and accented with blue Kraft Core cardstock.

IMG_6254

The handle is cut in many layers and attached with brads to make it really sturdy. I sanded the edges of the Kraft Core cardstock to expose the inner colour.

IMG_6251

My favourite part is the spout. I inked and sanded my pieces but I also poked holes that water would come out of.......although I don't recommend filling it, lol!

IMG_6253

I made a matching tag from one of the other sets that was included and attached it with tulle.


Photobucket

Tuesday, May 15, 2012

City Zoo - Inspiration Elevator Challenge #1

Hey Everyone! I want to introduce you to a new team that I have joined. Welcome to Inspiration Elevator!


Inspiration Elevator

Inspiration Elevator is a group of like minded scrappy friends who want to raise the bar in their own creative process through unique challenges that we issue to each other once a month. These won't be run of the mill challenges and we hope you will join us each month and be inspired by the innovative designs we create.

This is not a blog hop, and there are no prizes, but we would love it if you would take a few minutes to see what the rest of the Inspiration Elevator team created. We are sure you will feel inspired to get creative

Here is the team:

Ann

Audrey

Carolyn (that's me)

Cathy

Christa

Joanne

Laura

Laurel

Lisa M

Lisa S

Sue

The first challenge, issued by Christa, is two-fold: to create a new design that reflects your style, and to use a new product or technique that you find inspiring right now.

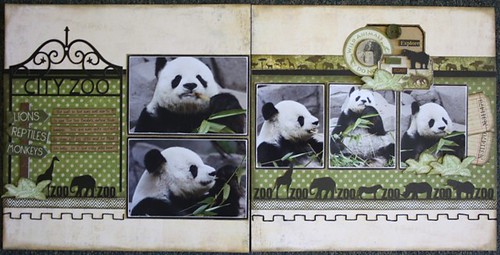
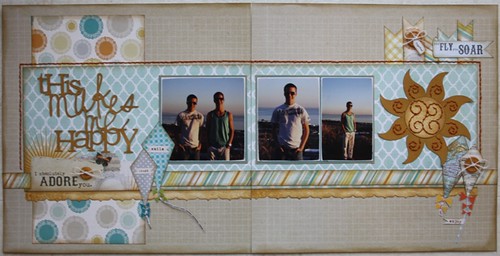
I am definitely a 2-page layout scrapbooker. That is not to say that I won't create single pages, I just prefer to make doubles. I like clean lines and good balance. The layout I created is a good reflection of my style.

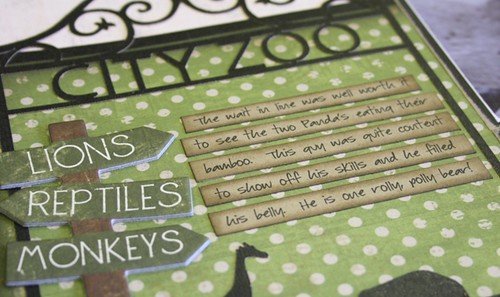
I am trying to stay focused on creating pages for Jason's (my middle son) California trip album. This is the first in a series of layouts that I have to create for our trip to the San Diego Zoo. They have the most amazing Panda exhibit there and we felt as though we were right in the cage with this guy!

IMG_6278

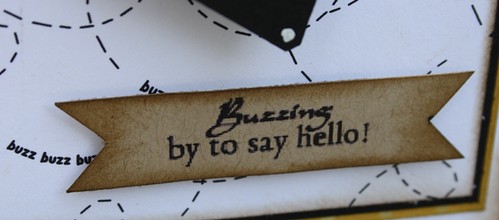
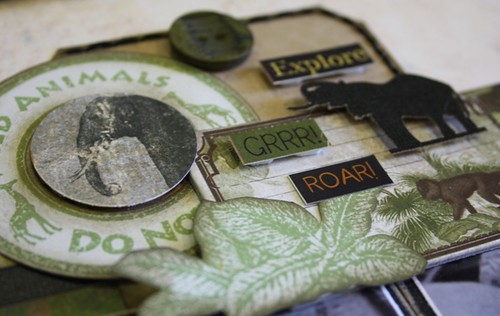
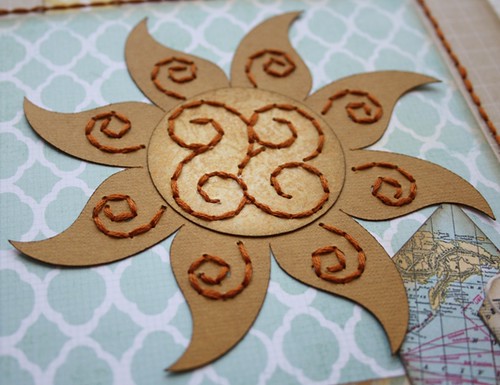
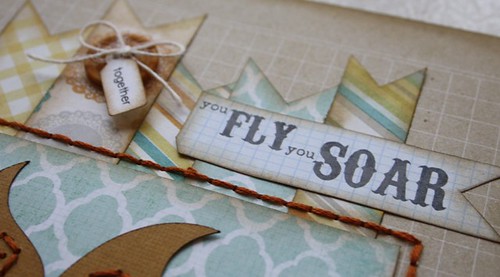
I kept the colours on my layout very neutral and focused on the black and green that was in the photos. I felt that this would really allow the photos to stand out and make a statement on my page. I incorporated stamps, die-cuts, stickers and this kraft tag to make an 'embellishment cluster' on page 2. I added some dimensional adhesive and some stitching to give my design depth.

IMG_6280

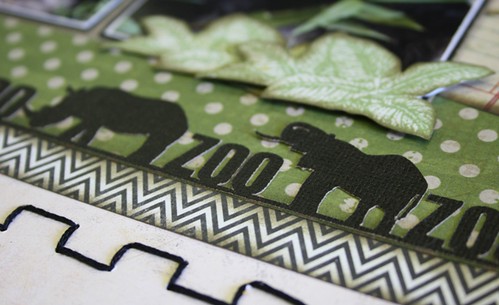
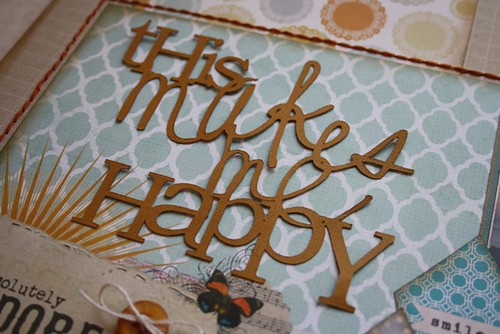
For the second part of the challenge I used my new Silhouette as the 'product or technique' that I find inspiring right now. I am truly addicted to my new machine and I rarely create something without using it. This border was cut using my new tool and it was perfect to tie together my page.

IMG_6281

I also used it to make the 'City Zoo' sign on page 1 of my layout. It made the ideal spot for my journaling too.

IMG_6282

I had a lot of fun working with Christa's challenge. I hope you enjoy visiting every month to see what the next challenge will be and what we all create on this journey. Be sure to visit the other ladies blogs by clicking on their names above or along the side bar of my blog.


Photobucket

Wednesday, May 9, 2012

Pinwheels - The Cutting Cafe

Everyone loves a party and what better way to celebrate.......with a party hat and pinwheels! This week at The Cutting Cafe we are working with pinwheels. This set comes with all sorts of shapes and sizes to play with and also some cute center printouts and little banner sentiments too.

I decided to make a party hat and embellish it with the pinwheels!

IMG_6273

I cut a bunch of them about 1-inch and then placed them along the bottom of the hat. I added a circle printout and brad to the center of each one.

IMG_6270

I made a bigger one and placed it on top of a scalloped circles and repeated the circle and brad theme!

IMG_6271

I didn't have any pom poms that matched my colours so I made one out of bakers twine. I glued it to the top of my hat! It was the 'icing on the cake'..........get it?

IMG_6272

Be sure to visit The Cutting Cafe blog and see what the other ladies have created using pinwheels! The blog post will be live sometime today.


Photobucket

Tuesday, May 8, 2012

This Makes Me Happy!

Good morning everyone! I am here today with another layout for Jay's California album. This is layout #3. I am so excited to be working on this for him. I even have layout #4 planned out.

These photos were taken in Malibu. We were just out for a drive and it was getting close to sunset. We ended up racing down to the waterfront and caught the most amazing view ever! Even the boys appreciated it (that layout is coming later).

IMG_6258

I played with my Silhouette and cut out this spectacular sun (don't you love it) and then I stitched the center of it, following the perforations that it made for me.

IMG_6260

I also cut out this title, which worked perfectly. I added a border of straight stitching around the main section of my layout too (I couldn't resist).

IMG_6261

I used some of the elements on the paper for embellishments on my layout as well as making some pennants too. I tied twine through the button and added a little tag for fun.

IMG_6262

If you are signed up for the next Sketch Club at Two Scrapbook Friends, this is the layout that you will be getting. If you haven't signed up, visit the blog for all the details.


Photobucket

Wednesday, May 2, 2012

Happy Birthday - The Cutting Cafe

This week at The Cutting Cafe, we had the opportunity to use whatever set we wanted and I chose the Social Butterfly printable set. It is filled with 22 different images to play with.

My Mom's birthday is coming up this Saturday and I thought this set would make a beautiful birthday card for her.

IMG_6255

I pieced the butterfly together using scraps I had in my scrap bin. I added some bling to the antenna and some foam adhesive to add some dimension.

IMG_6256

I inked up this birthday stamp for the first time and added my sentiment along with a ribbon bow.

IMG_6257

Be sure to visit The Cutting Cafe blog and see what the other girls have chosen to use for their reveal. The post will go up sometime today.

Thanks for visiting :)


Photobucket