Tuesday, February 28, 2012

Happy 18th Birthday - The Cutting Cafe

Today I am excited to show you a card that I made using the Milestones Number Shaped Cards & Sentiments from The Cutting Cafe! Check out the printable stamp below. It is the one that I used on my card.


Here is the card that I created with the files. David (Jay's best friend) is celebrating his 18th birthday in April and I thought I would be ahead of the game if I made a card for him now.

IMG_5944

I re-sized the number '18' to fit on top of the star (approximately 1"). I mounted the circle sentiment on a punched circle and then added the tab, button and pierced holes between the phrases.

IMG_5945

I used the other printable sentiment for the inside of my card.

IMG_5946

The inspiration for this card came from Pinterest. You can see the original card here!


Photobucket

Monday, February 27, 2012

Online Crop at Two Scrapbook Friends!

Two Scrapbook Friends is hosting an online crop. It started on Friday, February 24th and it runs through until Sunday, March 4th. Each member of the design team, plus Joanne and myself, all issued a challenge. The theme of the crop is 'Chase Away the Winter Blaahs', so all the challenges are 'warm weather' related.

My challenge is to scrapbook your favourite summer activity. For me, that could be many, many different things, but I chose to go with swimming in our backyard pool. It is our summer 'getaway' without having to go anywhere. The photo is of Jay & David, just after they did a marathon of flips and jumps off the diving board (those photos will be for another layout).

IMG_5927

I dug into my stash and found some papers and embellishments from Fancy Pants. The banner was cut from one of the papers and I added some brads between each point. This collection also came with chipboard elements and I loved the 'summer' word and it worked perfectly for my title.

IMG_5929

I layered some paper on top of a border sticker and attached it to my page using foam adhesive. I didn't add any journaling to my page but I did stamp the year.

IMG_5928

I added a bit of stitching to my sun and also incorporated some more of the chipboard.

IMG_5930

There is still lots of time to play along with the challenges and have a chance to win some prizes too. Click here for all the details.


Photobucket

Sunday, February 26, 2012

Broccoli & Cheddar Quiche

It has been quite a while since I have posted a recipe on my blog. To be honest, I haven't really made anything worth posting. Life is so busy that I don't really take the time to try new things.

Today was no different than any other Sunday, but I wanted to make something yummy for dinner. I didn't want to spend all afternoon cooking so I thought I would make quiche.

I found this recipe on the Kraft website and it seemed like it wouldn't be too much work. Hubby was heading to the grocery store anyways so I had him pick up what I needed.

I am just getting ready to sit down and give it a try. I will be back shortly to let you know how it was..............

It was delicious! If you would like to give it a try, here is the recipe:

1 cup sliced fresh mushrooms
1 cup each chopped onions and broccoli
5 eggs
1/3 cup Miracle Whip Calorie-Wise Dressing
1/3 cup milk
1 cup Kraft Double Cheddar Light Shredded Cheese
1 frozen deep-dish pie crust (9 inch)

HEAT oven to 375°F.

COOK vegetables in skillet sprayed with cooking spray on medium heat 5 min. or until crisp-tender, stirring occasionally.

BEAT eggs, dressing and milk in medium bowl with whisk until well blended. Stir in vegetable mixture and cheese; pour into pie crust. Place on baking sheet.

BAKE 40 to 45 min. or until centre is set and top is golden brown. Let stand 10 min. before cutting to serve.

Enjoy!

Photobucket

Friday, February 24, 2012

Happy Days - Sketch Support

I am so excited to post this layout. You know the feeling you get when you create something you love? Well for me, this layout is one of those things. It all comes down to the photo I used on this page.

This week it is one-page week at Sketch Support and here is the sketch that we used.

one-page(FEB) 2012

Here is my layout. I just love how it turned out. I have many hours in this one because of all the stitching on the background, but the photo is what makes me smile the most. It is a photo of my youngest son, Matt! He runs from the camera a lot, so we don't have very many great shots of him. I had some professional photos taken this past fall, and this is by far my favourite photo of him.

IMG_5845

I used one of my favourite collections from Echo Park to create my layout. You can see a little close-up of the stitched background. Most people won't even know it is there, but it makes me happy. I used some nice chunky chipboard letters in my title......I sanded the edges and then inked them before I stuck them to my page.

IMG_5847

I also love using this thin twine from May Arts. It just seems to go with everything and adds a little detail when you need something subtle.

IMG_5848

Journaling is something I used to leave off my pages in the past. I am so glad that I have been including it on all my layouts lately.

IMG_5849

Be sure to visit the Sketch Support site and check out all the layouts using this weeks sketch.


Photobucket

Thursday, February 23, 2012

I Want to Make This!

So, I don't know if you have heard, but Two Scrapbook Friends is going to be a Silhouette dealer! I can't wait to get my new machine.

Silhouette-CAMEO-multi-purpose-Cutter

I was on the Silhouette blog and came across this post. I really want to make this.......

wearefamily
And this.......

minivan

So excited!


Photobucket

Tuesday, February 21, 2012

Party Banner - The Cutting Cafe

I am so happy to be posting to my blog again and getting back into my design team creations. I really enjoyed my visit to Southern California, but I really missed creating with my papers and embellishments.

This week at The Cutting Cafe we were able to play with an awesome Party Hat Shaped Card file. I decided to take the card and turn it into a birthday banner. I just slipped the ribbon through the fold (at the top) and it worked perfectly.

IMG_5904

A hand-stitched the circles with teal blue embroidery floss and I covered the chipboard letters with matching paper. I really like the different options that are available with this set to personalize your creations. I used the star overlay and the circle border for the trim of my hat.

IMG_5905

I used an older collection from My Mind's Eye to create my hats......it is called Hip Hooray!

IMG_5906

I topped my hats off with some fuzzy little pom poms (which my youngest cat just loved....she kept running off with them in her mouth).

IMG_5907

I hope you will visit The Cutting Cafe and check out this awesome cutting file. Also, visit their blog to see all of the projects by the design team (the post is done sometime on Wednesday).


Photobucket

Sunday, February 19, 2012

Happy Birthday Marlene!

Today we are going out for dinner to celebrate my Mother-In-Laws 75th birthday. My hubby asked me to make her a special card to go with the gift we are giving her.

Here is what I came up with.

IMG_5902

I cut the flowers out of some pattern paper I found in my scrap bin. I added some leaves that I cut out using a new Spellbinders die.

IMG_5903

I hope she enjoys the card and celebrating her birthday with all her family and friends.


Photobucket

Friday, February 10, 2012

Welcome TSF Blog Hoppers!

Welcome to the first stop on the Two Scrapbook Friends Valentine Blog Hop! If you are looking for some inspiration for your Valentine's Day projects, you have come to the right place. You should have arrived here from the Two Scrapbook Friends blog. If you didn't, click here for all the details for the hop.

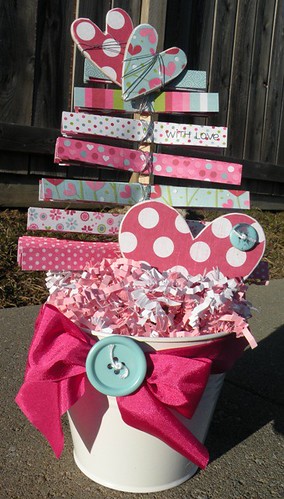
I can't wait to spread some love with the Valentine tree that I created using papers from We R Memory Keepers - Love Struck collection. I found this sweet tin pot at a local dollar store and the rest of the materials were from my stash.

DSCN1238

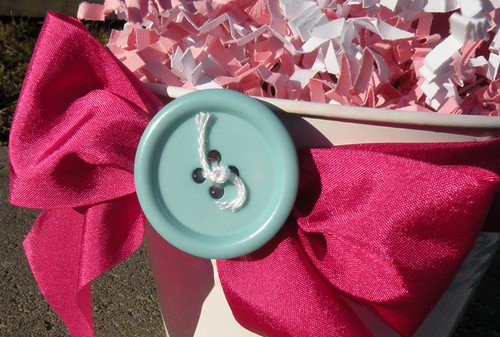
I wrapped some satin ribbon around the pot and tied it into a bow. This ribbon is available in our store and is super easy to work with. I am not a bow making expert and I find that this ribbon just falls into place. I added a matching button with some floss tied through the center holes.

DSCN1239

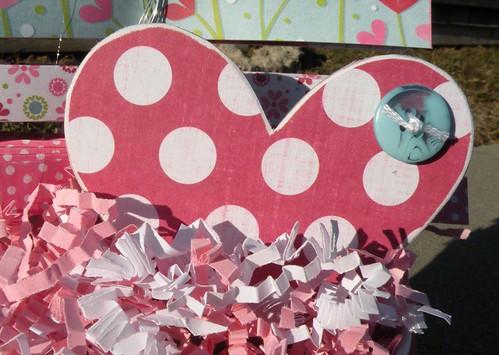
In the bulk section of our store, I found some chipboard hearts and covered them with papers from the Love Struck collection. I place the largest one along the bottom of my tree and embellished it with a button and floss to match the one on the bow.

DSCN1242

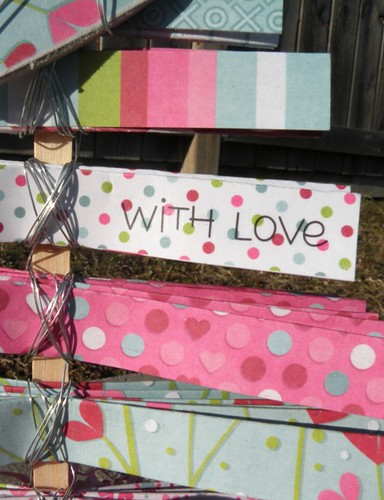
The paper is cut into 6 inch lengths and vary in widths from 6-inches to 3 inches. I scored each piece every 1/2 inch and folded it like an accordion. I attached it to a wooden dowel and fastened it with floral wire. On one of the strips I used a rub-on to tie in the Valentine's Day theme.

DSCN1240

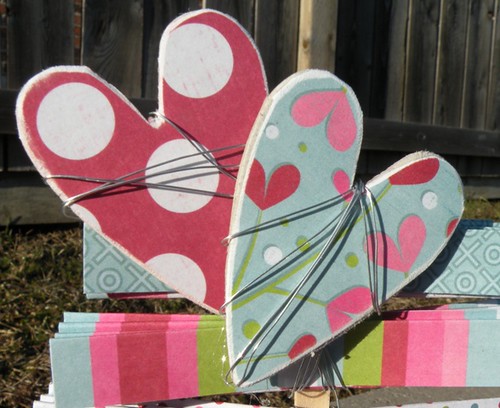
I added 2 smaller chipboard hearts to the top of my tree and wrapped them with some of the floral wire to match the stem.

DSCN1241

I hope this little project inspires you to get crafty for Valentine's Day. I plan to bring this out every year to make my home feel a little more festive. You could also take this same idea and use it for other themes too......St. Patrick's Day, Mother's Day, Canada Day, Christmas (an obvious one) or maybe even a birthday.

So from here, your next stop will be Christa's blog. She has something very lovely to share with you......but before you go, just remember.........

In order to be entered to win:

1. Leave a comment on all the blogs as you go and then go back to the Two Scrapbook Friends blog and leave a final comment there.
2. To have a second chance to win, keep track of the HIGHLIGHTED WORD(S) that appears in red from each blog and email the phrase to 2friends@execulink.com. Put "Blog Contest" in your subject line.
3. Check back at the Two Scrapbook Friends blog on February 14th to see if you are the winner. (Winners will not be contacted personally.)

Have fun hopping!


Photobucket

Tuesday, February 7, 2012

Southern California at its Best!

Hello friends and followers! I have not been concentrating on scrapbooking since Jay and David arrived in California. We have been on the go non-stop trying to take in as much as we can. The weather has been amazing.....sunshine everyday with temps in the mid twenties.

Here are some highlights from our stay! Our first stop was Universal Studios-Hollywood.

The guys went on the Simpsons ride (I sat that one out). Before they went on, Bart and his family were available for photos. Dont they look like the belong together.

We also went on the Mummy ride (yes, I went on too). They had this guy walking around and he just kept following us everywhere. He scared the crap out of me when we exited the ride and then the boys took this photo. His eyes were so creepy and he didnt crack a smile.

The next day we hit Venice Beach. It was amazing. The guys were facinated by all there was to see. We found this on the graffiti wall and thought it made a perfect photo.

From Venice we went to the Santa Monica Pier. This was a great pier with lots of entertainment. Here are they guys holding an 80lb snake......the photos were worth the $5 I paid the guy.

We drove to San Diego and visited the zoo. That was the best zoo I have ever been too. We took some amazing photos of all the animals, including this adorable Panda Bear. He was posing while eating bamboo.

We were lucky enough to catch the sun setting in Malibu. We pulled over and stood on the coast and watched the sun melt into the water.

Yesterday, we hiked up several mountains and took some breathtaking photos. They are not loaded on to the computer yet, but I am sure you will see them on future layouts.

Time to wake up the guys and start our final day in Southern California. It is our first day of rain, so we are not sure what the day will hold.....whatever it is, it will be an adventure.


Photobucket